Tuesday, October 28, 2014

Where Have I been?

Wow, it's been quite some time since I last posted. Opps... But I have a excuse. Yesterday and the day before, my internet was down so I was unable to work on my blog post. I apologize for the lack of posting

About my next few posts, I hope to have a type of how to tutorial for a recent dress I sewed (which I will be showing you at the end of this post). I always forget how long it can take me to design and draft an outfit. Truly that is the toughest part for me especially since I have to scale it down to an 18 inch size. But it's quite an adventure and somthing I enjoy doing.

Now, I have a couple sketches I drew recently that I wanted to share with you all. I mainly sketch as a way of brainstorming for ideas however I hardly ever actually use them as designs for doll clothes. Also, over the couple year I have been drawing I have seen huge improvment (trust me, I used to be far worse).


 I don't know what I did but I love the hair on this one. About the outfit, I like the peasant style under blouse. Maybe I'll try making it someday as it would easily match with many corsets and tops.


Interesting corset design. But mainly the whole outfit is untranslatable to doll clothes. The top is too detailed for such a small doll and simply wouldn't look good since the doll has absolutely no figure. The boots are cool but I'm not sure if they will be helpful in designing new boots.


 Believe it or not, I originally tried to make this outfit water themed. Clearly that idea quickly got lost. Although the top neck intertwining things might work on human clothes, you cannot do that in the same way for doll clothes, trust me, I tried.


Another corset? Really I'm so uncreative. Overall, I just love the loose flowy look of this. Like I said earlier, you can't really recreate this for doll clothes but it's fun to draw.

Okay, I've been designing and sewing a new doll dress this past week. I have a couple of (lame) pictures to give you an idea of what I've been working on. 


So have a nice week and if you have anything you would like to say, ask, or request just leave it below in the comments. Thanks for reading.

Wednesday, October 22, 2014

First Blog Nomination


Hello everyone!

I was nominated for the New Blogger Award from AJ at http://americangirlaj.weebly.com/


This award is for people's blogs who have been blogging for under a year and have less than 100 posts. Thank you so much AJ and here are my answers.

1. What is your favorite thing to blog about?

Definitely sewing. Sewing is one of my hobbies and my passion. And nowadays people don't appreciate sewing or know how to sew. So I love showing my process and about the different outfits I create.

2. What's your favorite holiday? Why?

Favorite holiday... I'm going to be a bit cliche and say Christmas. Just the excitement and seeing family and friends. I always get such a warm feeling inside. It truly is a magical season and a needed break from school.

3. What post would you like to see me do more? Why?

 Either reviewing outfits or photo shoots. Reviews because I love hearing other people's opinions about the difference doll clothes styles. As for the photo shoots, I'm always on the lookout to improve my photos and the difference poses and such.

4. What's your favorite thing about fall?

Oh, wow, there are just so many. Definitely the weather as it becomes more bearable than summer. Also I can finally start wearing boots, sweaters and layers again.  My birthday is in fall which is pretty awesome. But also I love the food, both apple and pumpkin pies, soups, and warm foods. The colors are amazing as well.

So I'm going to nominate Kathleen from http://www.dollsanddance.com/. Here are my questions for you.

1. What was the first doll you received?

2. What is your favorite season?

3. What is your favorite movie?

4. What type of outfit would you like to see me sew?

So that's all for now. I apologize for the lack of posts this week but my life has been a bit busy. Right now I'm working on drafting a new design so hopefully if that goes smoothly I'll have an outfit to share with you all. Talk to you soon.

Thursday, October 16, 2014

Sewing boots... by the million (part 2)

Alright let's continue with these boots. You can see the first part here.
 
For the soles, I cut out a cardboard base out of a Kleenex box. Then I took a bit of the fabric glue and spread it out.


And then firmly pressed the cardboard on the wrong side of the fabric.


Clipping the edges is very important for the soles because otherwise it would be nearly impossible to get the edges to lay flat.


More glue and then press the tabs down. Tada , you have one sole. Now you have to repeat the process since each boot uses two sole pieces. 


All the pieces ready for the final construction.


Okay, now we are ready to glue the entire boot together. Take the first sole piece and lay it against the doll's foot like so. 


Then take the toe piece (because you want it to lay underneath the side) and curve it around the toe. First figure out where the you want the two edges to lay (where my fingers are). Then glue those edges down, remove the boot from the doll and clothespin it until the glue is dry.


Once the glue is dry, you are going to clip the edges, put it on the doll to see how you want it placed, and glue it all down. Sorry for the lack of pictures here, it's hard to be gluing and taking pictures at the same time.


Repeat the same for the other piece.


Okay now all that's left is the sole. Just put a bit of glue on the sole as well as the bottom of the boot and stick them together. 


Clothespin until dry... 


Okay here is the boot all glued up


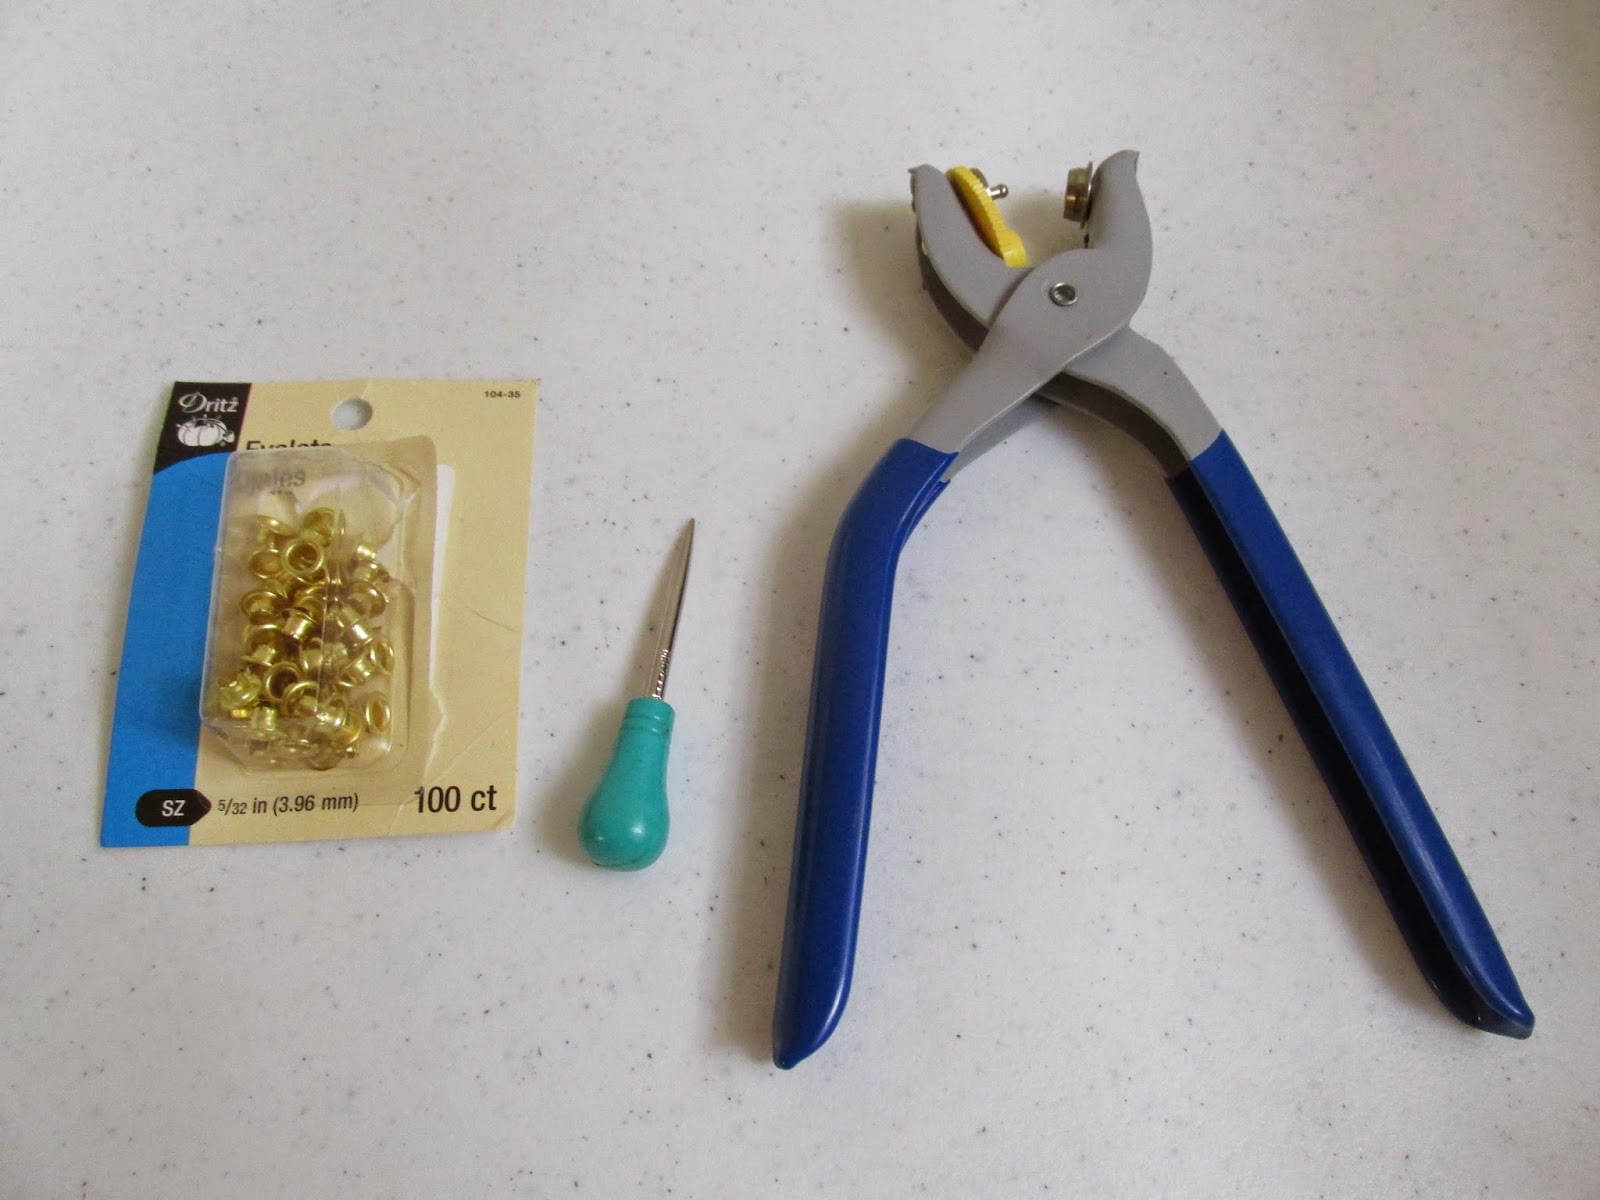
Now for the eyelets! I believe we brought the pliers and eyelets at the local JoAnns and as for the awl, I found it in one of our sewing drawers.

Decide where you want your hole to lie then slowly push and twist the awl until it goes in. 


 After stretching the hole a little wider, I took an eyelet, placed it on the awl and pushed it through the hole.


Smashing the eyelet.


Isn't that beautiful.


Now repeat the process until you have your desired amount of eyelets. One boot done! Congratulation! Now repeat the whole process again and get your second boot.


It's defiantly a lot of work to make each pair and requires patience and precision. However, I believe the result is simply beautiful and you won't find it at the American Girl store. 

If you learned something and enjoyed this tutorial please, share it with your friends.

Tuesday, October 14, 2014

Sewing boots... by the million (part 1)

Due to the length of this post, I have decided to split it into two parts. The first will cover from cutting out to the top stitching and the second will be on the gluing and eyelets. Enjoy!

As I prepare for the upcoming craft fairs I find myself sewing boots... a lot of them. Since I'm now a professional at making doll boots (just joking), I thought I would share the process with you all. So here is what I will be making. 


Let's all just enjoy this fabulous picture of my boots.


So, for this next pair of boots I picked a different fabric. Darker, smoother and thinner. Unlike the above picture, this pair isn't going to have a different colored tongue


Next I changed the pattern slightly from the original boots. Mainly I shortening them and adjusting the fit.


All the piece cut out. Two of each since the boot is lined. But note that this is only for one boot and you need two to make a pair.


Then since the fabric was kind of flimsy I ironed on interfacing. The two only partly covered in interfacing will be folded in half to form the sides of the boot.


Now for the sewing, I sewed the boot side pieces right sides together. Also, I took the toe and sewed it together to the tongue along the curved edge.


I took the side piece, made it like a tube and then matched the previous seams together and then sewed up the top.


After clipping and turning right side out, I top stitched it to give it a final finish.


Here is your boot side. The eyelets will be set in later. It's not a straight piece as the doll's leg curves in and out. 
 

For the toe and tongue, I sewed the interfacing piece together with he other piece, but left the toe part open because that side will be glued to the sole.

Again, clip and top stitch. For the top of the tongue, I did a fancy stitch to give it more decoration. (Be sure not to brake your needle on the foot like I did. That's why I switched to the walking foot)


All finished and ready to be glued.


Okay, that's it for now. I'll post the next part in a couple days but is a picture of the finished product to keep you until then.


Saturday, October 11, 2014

Saturday Sketches


What's up peoples?
Okay, originally I was going to post a tutorial/the making of my boots. I still will, however I'm not quite done with it yet. In my mind I believe every post should be faultless and perfectly done (yeah I'm a perfectionist).  Reality is that I don't have a million hours every day so I just have to make do with what I have. That's what life is all about isn't it? Wherever we are, in whatever circumstance, we are to be content and create something with whatever materials, abilities, and time we have. Don't look to me as an example, it's so easy to preach and not actually do anything.

Anyways, enough of my inspiring message, because now we move on to more interesting topics. I have some pictures of some drawings that I would like to share with you. I am by no means a professional drawer and honestly I think myself quite terrible (like I said, I'm a perfectionist). Usually, I draw for either practice, leisure or just to get brainstorming for drafting doll clothes. They range from terrible, which I will not be sharing today, to okay, to that's pretty good. 

So let's start with my least favorite of the bunch.


I don't even know what I was trying to do here. A patchwork jacket? Really? It sure looks like that. Her hair looks really thin too... She looks unhappy but I can't blame her. (Also you might notice a lack of hands due to the fact that I stink at drawing hands). Maybe some color would help. (By the way, she is suppose to be wearing leggings but it's really hard for me to show that).

Okay let's move on. How about this.


I'm not sure whether those curvy things are suppose to feather or something else. Her sharp looking gloves are kind of cool. However they don't match the outfit very well and she would probably poke herself every time she moved. Again limp hair... Sign... But then again, I would love to have an dress like this. I'd probably get some strange looks though.


For some reason this always reminds me of a witch. Not sure why since it isn't overly witchy. Her necklace/ thing would annoy me so much. I personally can't stand wearing necklaces and jewelry as they itch and  drive me crazy. The top came out nicely. There would be so many fun ways to use that in real life layering. And as you can tell, I'm trying to figure out how to shade draping, folds and creases. Overall, I actually like this outfit.

I had fun with the posing on this one. Something fun and happy. By now you can see that I love drawing boots. Boots are awesome since I find that you can add a ton of details to them as well as they are easy to draw. If you are wondering why my models don't wear heels, well, that a reflection of me. I can't, hate and don't understand heels ( if you can wear heels, kudos to you). So basically I draw what I wish people would wear in everyday life. 


Yes, that is suppose to be a sword. I've drawn lots of swords so I was striving to be unique on this one. That was meant to be a twisted blade. Can it do any damage? I doubt it. More boots! And weird square sleeves. She looks like a fish with fins with those sleeves. More feathers but I think they look cooler here. I wish I had lovely hair like that with it being so graceful and perfect. Overall the style is mixed like I couldn't make up my mind. But mistakes are just part of the process. 

What did you think? Disagree with my commentary  well, leave a comment below and tell me which is your favorite. Maybe with enough input I'll consider drafting a miniature version for dolls and share how I make it. So let me know and thanks for reading!

Monday, October 6, 2014

Wardrobe of Memories


Welcome to Wardrobe of Memories


If you look around the world of American Girl doll clothes, you might notice a lack of fantasy, medieval or just creative designs. I did. No matter where you look, Etsy, Ebay, American Girl Doll Clothes, or at your local craft fairs. Sure, there are many modern, period and costumes but there isn't anything that is unique. I was a bit disappointed when I noticed this. But more than that, I wanted to do something about it. So I made my goal to sketch, design and sew the outfits that will create memories.
Now, a little bit about me. I'm Nicole and am fifth teen years old. I'm home schooled in high school and am dual enrolled at a community college. It's bit of a handful keeping up with life but I make time to sew because I love doing it.

How did I ever get into sewing? Good question. Let see, I have been sewing since I was around nine but have been watching my mother long before that. I remember when my sister and I asked my parents for a doll. They agreed but with one condition. We were to either buy or sew the doll's clothes. The choice was obvious. Why wouldn't we want the opportunity to create the clothes we wanted.

At first, our attempts were simply to clothe the doll. Easy fabric, simple patterns and lots of help. Seams were croaked, the hem was uneven and the dress didn't fatter the doll at all however I was happy.
 

 Whenever we thought the doll needed either a fancy ball dress or a simple nightgown we would sew it ourselves. As I got older I started to sell some outfits to friends. I was surprised at their reaction. They were impressed. (However looking back upon these sad attempts I feel quite bad for those first customers).
But then it happened. I was older. Dolls were "cool" anymore. I didn't play with our doll anymore. Sure I sewed a little now and then to make some extra cash but I didn't really care about the outfits I was creating. Of course there were a couple outfits I was quite proud of during that time such as this fairy.


But Because it was easier, I just mixed and matched Jo-Anns patterns to design a slightly different outfit. Straight sleeves, puffy sleeves, no sleeves, or was it the length of the dress or the neckline. All I was doing was making generic doll clothes. 


One day it all changed. I saw a dress somewhere and I wanted to recreate it. It had pleats down the front and back and didn't look too hard so I gave it a shot.  I didn't know what I was doing. I just took a pattern, added space for the pleat and cut it out. This was my first original design that was successful. You would think that I would immediately love designing and have a passion for drafting. No... Not really. It took a while to grow on me. There were little steps; drafting the bodice, princess seams or maybe pin tucks. But I started to make my own well fitting designs.

Then it exploded. I cared about how it fit and the look of the dress. I began to love to create new design (whether they were successful or not is another issue). But also I found what type I wanted to create. Fantasy, medieval and costumes.

Now that is me and how I got into sewing in a nutshell. Now what do I hope to accomplish  here on this blog. Well, to record my process as well as share how I design and sew.


Actually I feel indebted to the many tutorial I've read and watched that have inspired me. So perhaps now I've have the opportunity to give something back. Maybe along the way I'll show some of my techniques or tips.


While I plan to show you my final products, I also would like to show you my saddest failures and what not to sew for dolls. After all, you do learn a lot of what NOT to do after sewing for over 5 years.


In the end though, my ultimate goal is to inspire you. Why? Well, I probably wouldn't be sewing if no one inspired and encouraged me along the way. So maybe thread your needles and buy some fabric and join me on this adventure.